Bring Your Own Model to Syncless
Syncless runs on Claude by default. But what if you want to use GPT, Gemini, Grok, Qwen, or DeepSeek instead? You can. Here's how to plug in your own API key and make Syncless speak through any model you choose.
Syncless is powered by Claude out of the box. Every conversation, every agent loop, every task — it all runs through Anthropic's models on our servers. And for most people, that just works.
But some of you have your own keys. Maybe you have an OpenAI enterprise account with negotiated pricing. Maybe you're in a region where Anthropic access is spotty but Qwen or DeepSeek is blazing fast. Maybe you just want to experiment — run your daily tasks on Gemini Flash for speed and save Claude for the heavy thinking. Or maybe your company policy requires all AI traffic to go through your own endpoint.
Whatever the reason: Syncless doesn't lock you in. You can bring your own model — any model — and make it the brain behind your workspace.
Why This Matters
The default experience is tuned and tested. We pick the models, we handle the routing, you just use the product. But AI moves fast. New models drop every week. Some are cheaper. Some are faster. Some are better at specific tasks. And your needs aren't the same as everyone else's.
With BYOK, you get full control over what model runs behind each scenario in Syncless — without losing any functionality. Same tools, same devices, same collaboration templates. Just a different brain.
Step 1: Open Model Provider
Head to your workspace settings. In the left sidebar under Workspace, you'll find Model Provider.
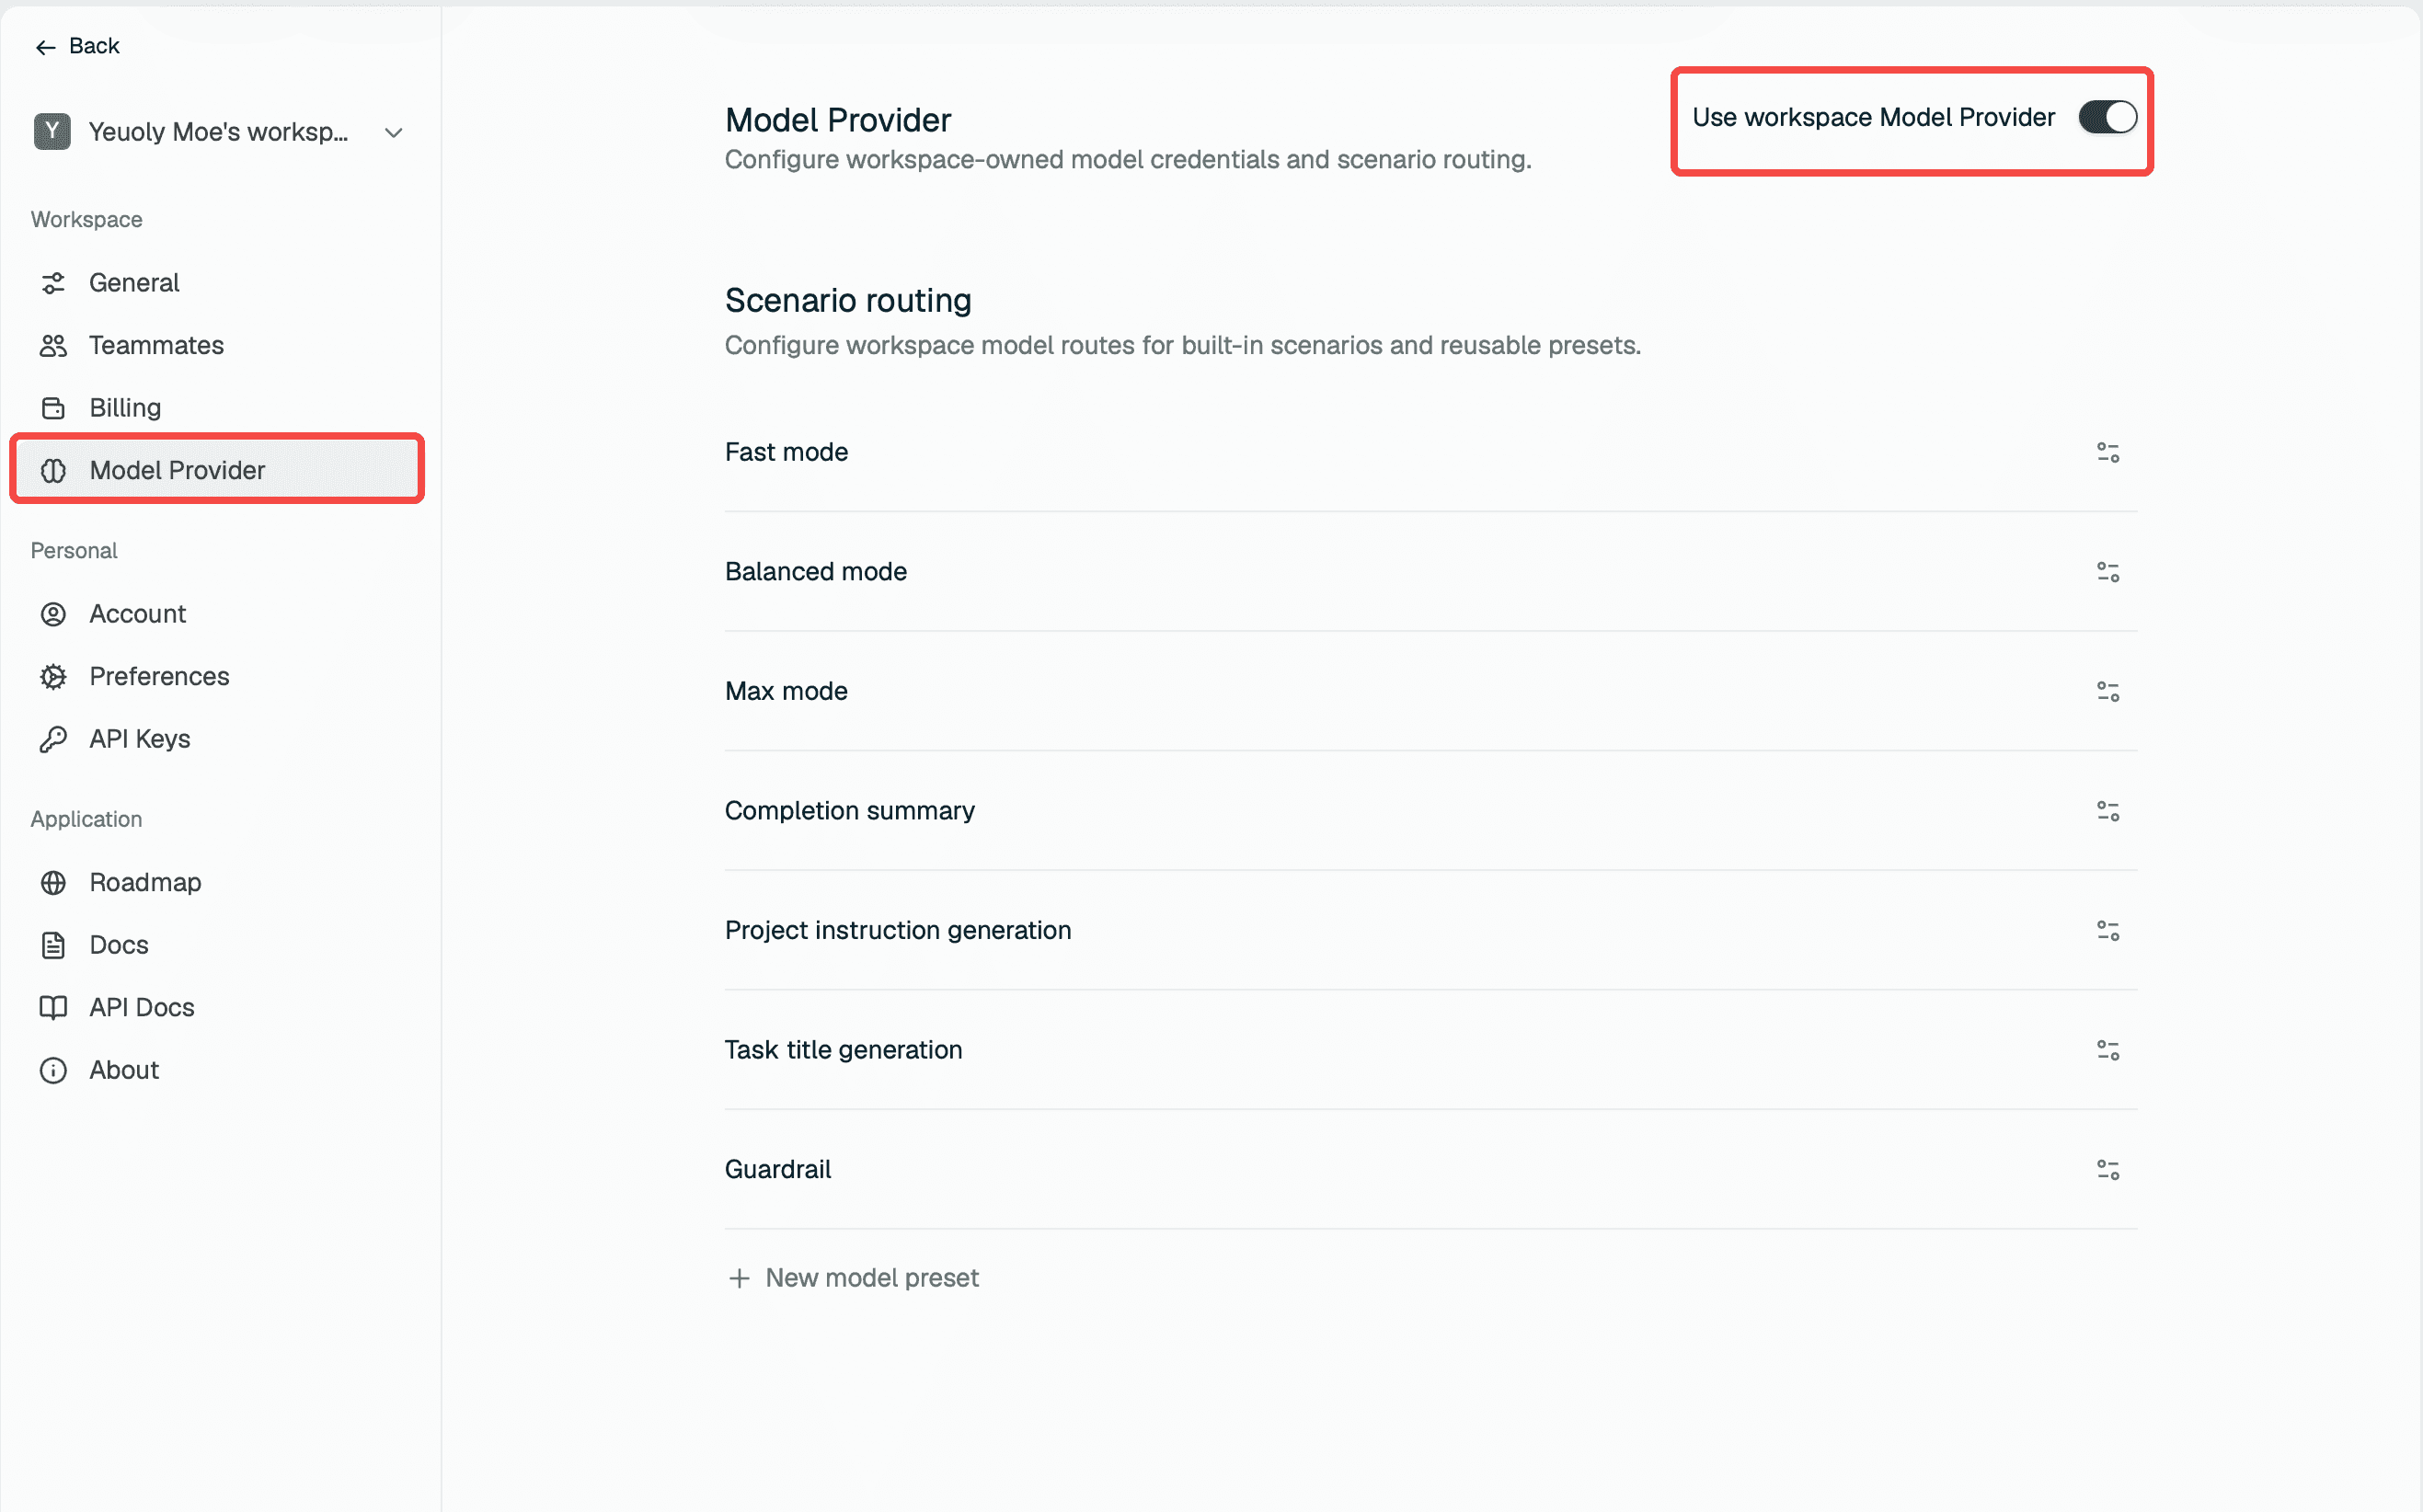
Right now it's off — your workspace is using the Syncless default. Flip the toggle to enable workspace Model Provider.
Step 2: Pick a Scenario and Connect Your Key
Once enabled, you'll see a list of scenarios — Fast mode, Balanced mode, Max mode, and more. These are the different modes your agent operates in. Click the gear icon on any scenario you want to configure.
Also, beyond the built-in scenarios, you can create Model Presets — named model configurations you can assign to individual nodes in your collaboration templates.
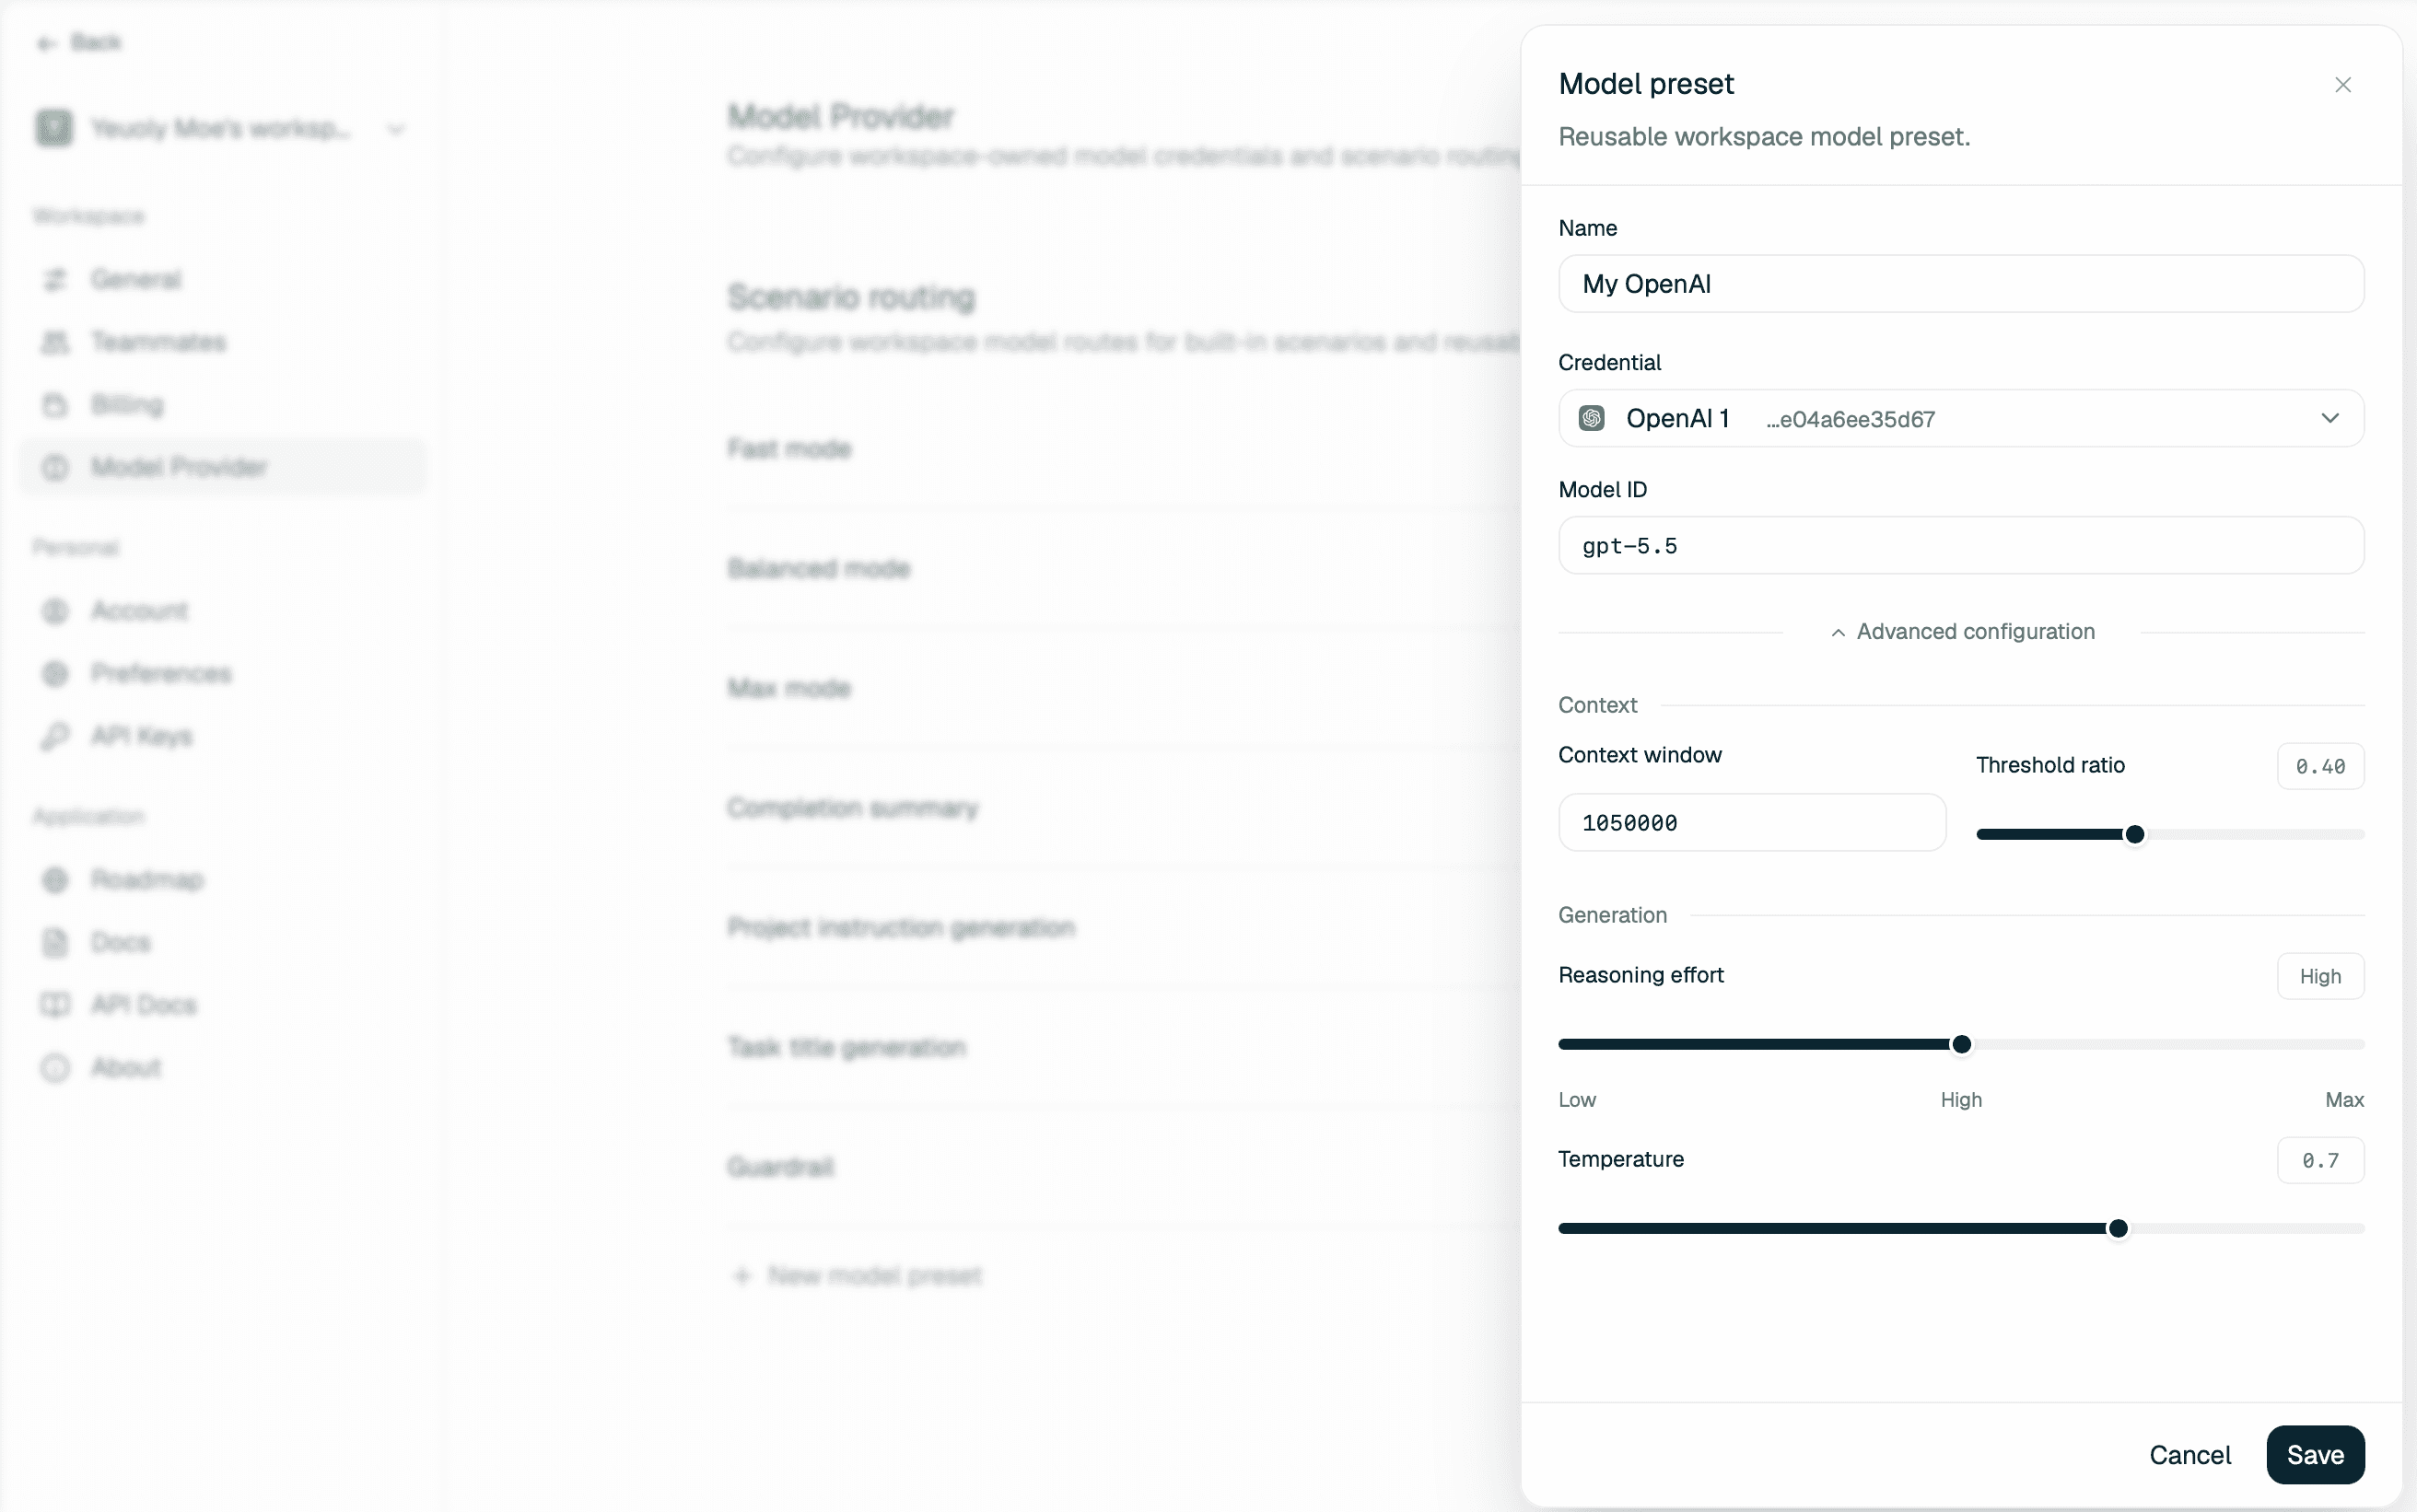
At the bottom of the scenario list, click New model preset. Give it a name, pick a credential and model, save. Then in any template, assign this preset to a specific node — and that node will always use your chosen model, regardless of what the rest of the workspace is running.
Now, a panel slides in. The first thing it asks for is a credential — your provider and API key. Click New to add one.

We currently support: OpenRouter, OpenAI, Anthropic, Gemini, Grok, Qwen, DeepSeek, Moonshot AI, MiniMax, Z.ai, Bedrock, and OpenAI-compatible endpoints.
Pick a provider, paste your API key, and save. Syncless tests the connection instantly — if it passes, your credential is ready.
Step 3: Choose Your Model
With a credential saved, now pick the model you want this scenario to use. Syncless shows a catalog of available models for your provider — or just type in any model ID directly.
Hit save. That scenario is now running on your model.
Repeat for any other scenario you want to route. Mix and match however you want — Gemini Flash for Fast, GPT-4o for Balanced, your own Claude key for Max. All in one workspace, all using your keys.
Using Your Model
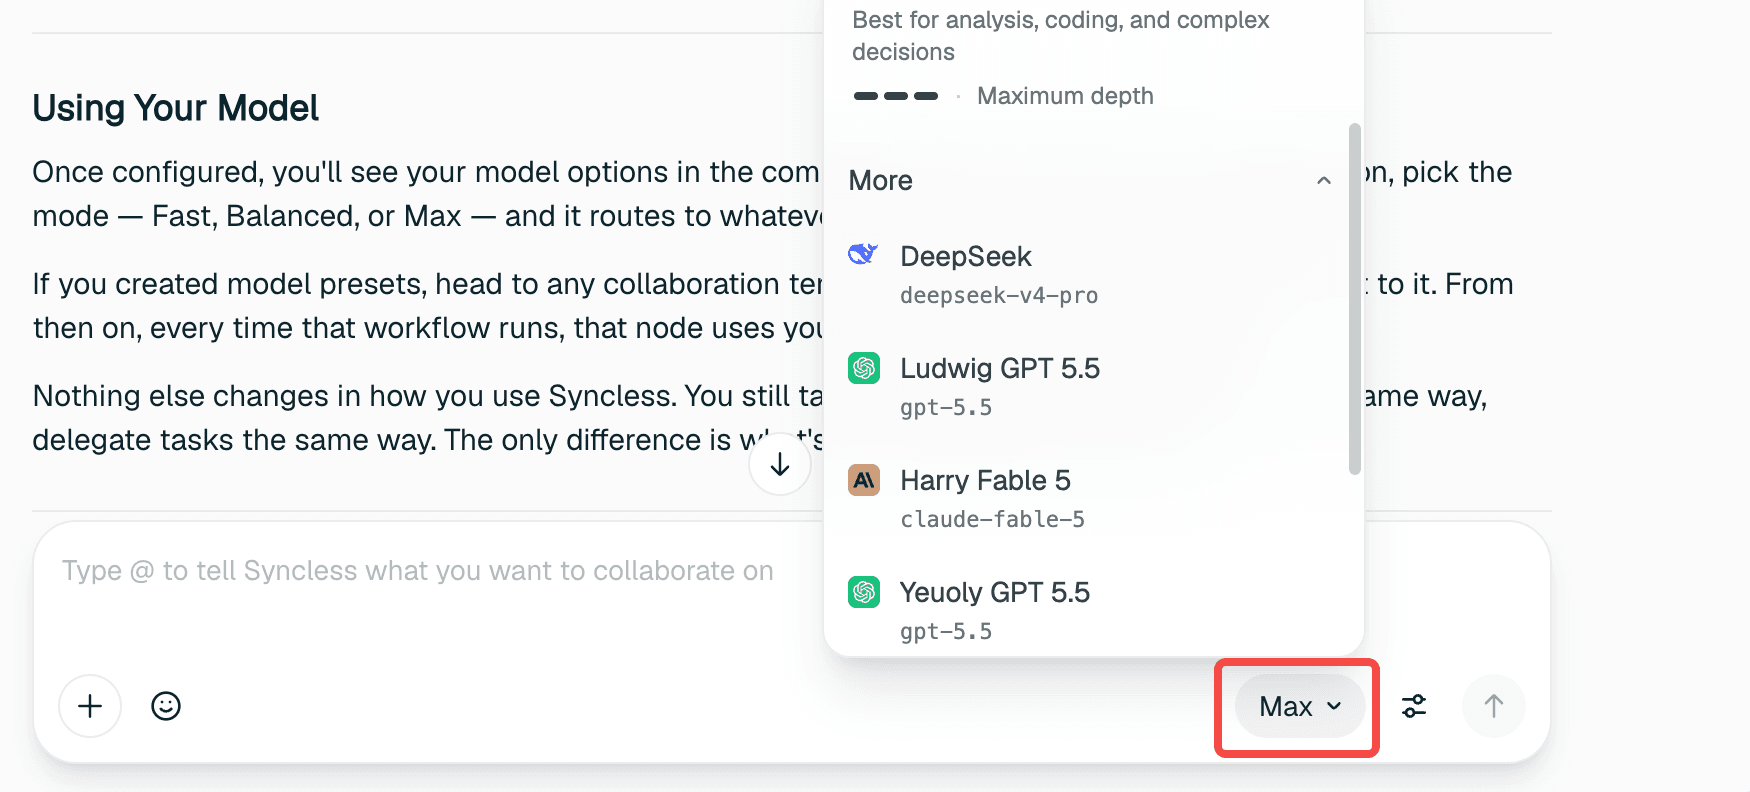
Once configured, you'll see your model options in the composer. When you start a new conversation, pick the mode — Fast, Balanced, or Max — and it routes to whatever model you set up for that scenario.
If you created model presets, head to any collaboration template, click a node, and assign a preset to it. From then on, every time that workflow runs, that node uses your chosen model automatically.
Nothing else changes in how you use Syncless. You still talk the same way, mention devices the same way, delegate tasks the same way. The only difference is what's thinking behind the scenes.
© 2026 LangGenius, Inc. All rights reserved.